Create a Master Project

Purpose

Master projects are typically larger scale projects comprised of multiple plans and elevations that are later divided into smaller production projects. In addition to tract housing projects, master projects can be used for price book trusses.

Steps

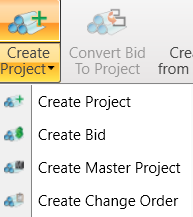
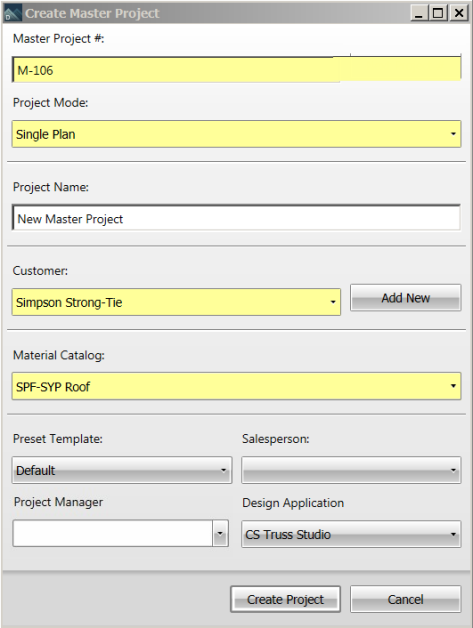
To create a master project:

  1. From the main CS Director window, select Project List.
  2. Click Create Project > Create Master Project.


  1. Complete the required fields and any additional fields that are needed.

Required fields are highlighted in yellow.

  1. Master Project # is initially populated with the next sequential number. This can be overwritten by selecting the field and typing a manual project number.

a.  To define preset numbering, see Project Numbering Field Descriptions .

  1. Project Mode is used to create projects in Single Plan Mode or Multiple Plan Mode.

It is possible to convert a project from Single Plan to Multiple Plan, but it is not possible to convert a project from Multiple Plan to Single Plan.

  1. Project Name is not required to create a project; however, a project name can assist in locating a specific project from the project list. When you enter the first letter of a Project Name, a list of existing projects displays.
  2. The customer is automatically populated with the first customer in the database, organized alphabetically.

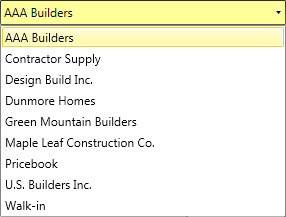
a.  You can select a different customer from the list.

b.  To add a new customer, click Add New.

For more information on adding a customer, see Administration - Company Information.

  1. Select a Material Catalog to be assigned to the master project.

  2. Select a Preset Template from the list.
  3. Select a Sales Person from the list.
  1. Select a Design Application from the dropdown list.

  1. Click Create Project.

Related Topics