|
To
import a file component:
1. Select the Components tab for a project.
2. Click Import From File.

3. Browse to locate the
truss file.
4. Select truss file to be imported.
Use Ctrl-click to select multiple files.

5. Click Open.
If the truss already exists in the project, the following dialog displays.
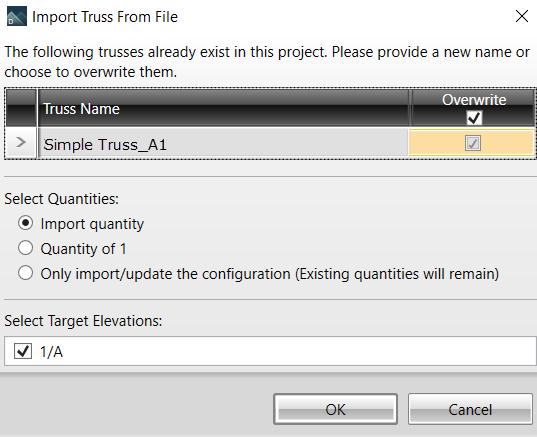
Three Quantity options display:
-
Only import/update the configuration… - Imports the component without specifying a quantity. Therefore, if a component overwrites an existing component, the quantity will remain unchanged. If the component does not overwrite an existing component, the quantity will be zero. This option will also cause the “Target Elevations” listbox to become disabled.
The Select Target Elevations section includes all the plan/elevations defined in the target project. The quantity imported for each component is per elevation. For example, if you import a new component with “Quantity of 1” into three elevations, the total quantity displayed in the Components tab for that specific component should be three – one component in three elevations. This section will be disabled when the “Only import/update the configuration…” radio button is selected, since quantities are ignored.
 Note: For single plan projects, the Select Target Elevations option is not available. Note: For single plan projects, the Select Target Elevations option is not available.
6. Select whether you want to overwrite any existing files.
7. Select the quantities to import and click OK.
The imported trusses display in the Components list.
|