|
To
import a Design Data Package:
- From the main CS Director window, select Project List.
- Double click a project in the Project List and the Project Info displays.
- Click Create Project from Design Data .
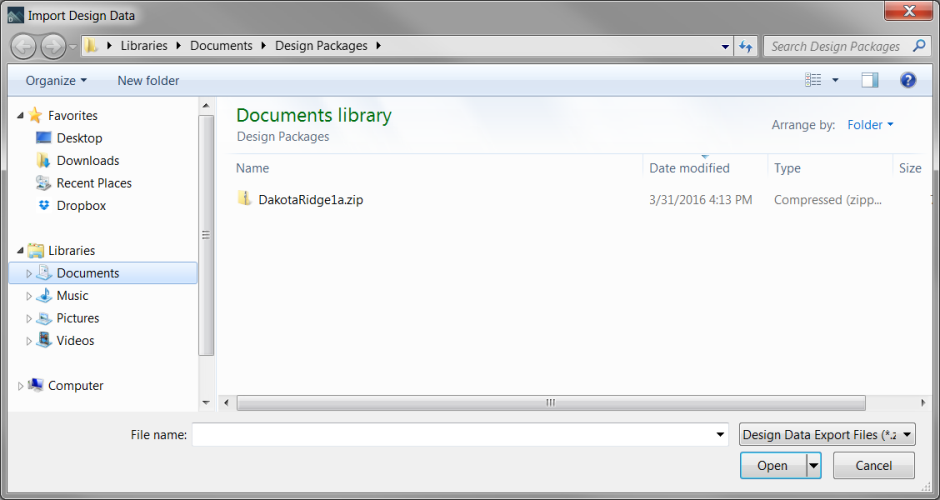
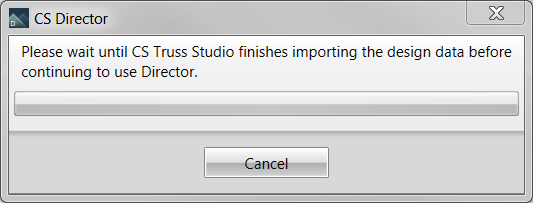
- Select the project to create/import and click Open.
- Select the plans/elevations and components to include. You can also import DDPs that contain plans/elevations organized by release level.
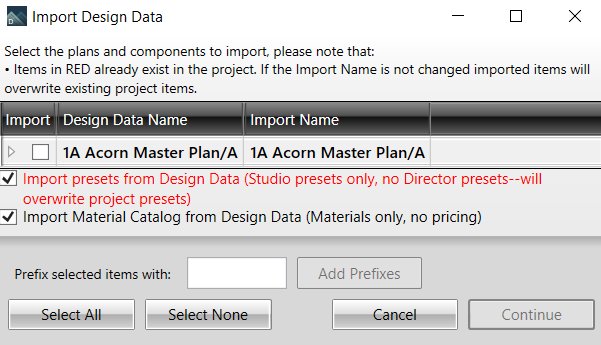
- Import presets from Design Data: When this check box is selected, the existing project's presets are overwritten with the Design Data Package Presets, otherwise the existing project's presets are retained. The presets in Design Data Packages are Truss Studio presets, not Director presets, such as labor. Labor for trusses imported from a Design Data Package are based on the current project's Presets > CS Director > Pricing window.
- Import Material Catalog from Design Data (Materials only, no pricing): When specific materials from the Design Data Package are not present in the existing project's Material Catalog they are added to the existing project as Unavailable Materials.
 Note: Materials in Design Data Packages do not include pricing. Pricing for materials are based on the values in the current project's Project Materials. Note: Materials in Design Data Packages do not include pricing. Pricing for materials are based on the values in the current project's Project Materials.
Notes • When a truss in the Design Data Package has the same name as a truss that already exists in the project, the Import Design Data dialog displays the truss in red. - If the Import Name is not changed, the existing truss is overwritten by the import process. (The imported truss configuration replaces the existing truss configuration.)
- If the Import Name is changed, the imported truss is added to the project with the new name and the existing truss remains.
- There are two ways to edit the Import Name:
1. Edit the name directly in the Import Name field. 2. Use the Add Prefixes option to rename multiple Import names at once.
• The Add Prefixes button will prefix all selected trusses with the information you enter.
• Notes for trusses that are associated to a layout (not user-managed):
Due to limitations with the import process we cannot rename trusses associated with a layout. Therefore, when a layout truss (with the same name as an existing truss) is imported there are two possible actions:
• Overwrite the existing truss configuration with the imported configuration using the same name. • Import the truss with a new name and keep the original configuration. • After the import process both versions of the truss will exist in the project.
• The original truss will retain its association to the layout. • The imported truss will have the new name, be set to User Managed and will be place at the bottom of the stacking list.
If you decide that the original layout truss should be replaced with the imported user-managed truss the process is to: • Handle the original layout managed truss: • If the layout managed truss is no longer needed it should be deleted. • If the layout managed truss is still needed rename the layout managed truss and set the User Managed checkbox so that it is not deleted when the layout is saved.
• Rename the imported user-managed truss to the original layout managed truss name; the layout will pick up the new configuration. If there is a conflict with materials, the following dialog displays. 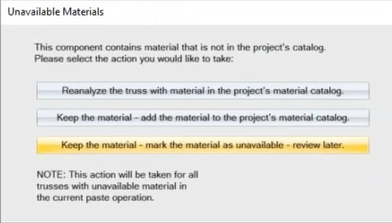
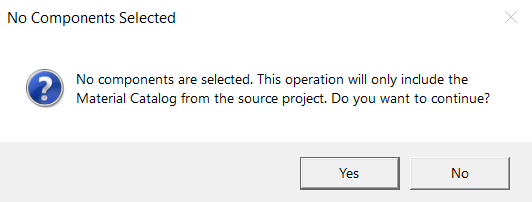
- Click Continue and a CS Director message window displays.
- Select Plans/Elevations to display the imported components.
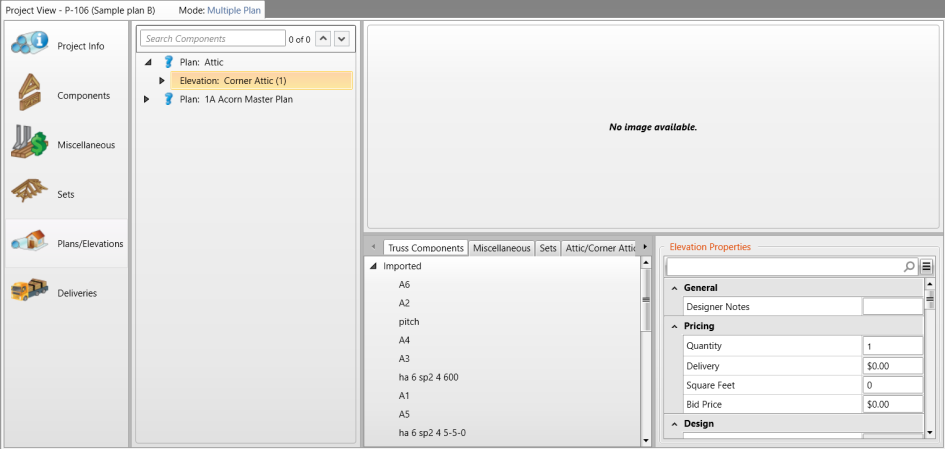
Note that DDPs include the Analysis Selection Priority when including material information on the import. Additional project information includes: • Stack list information including banding lines and banding notes • Sets, including name, description, and type • Misc items • Production groups, including the order they are displayed • Component order from the component tab • Order of plans and elevations on the P/E tab When importing a Design Data Package into a project that already contains trusses with the same names as the imported trusses the import dialog provides options for overwriting the existing trusses or renaming the imported trusses. |