Create a Change Order  

Purpose

Use Create Change Order when an additional item, repair, or add-on is needed and you would like to retain the original project. Additional reporting options are available to track changes within a project.

Prerequisites

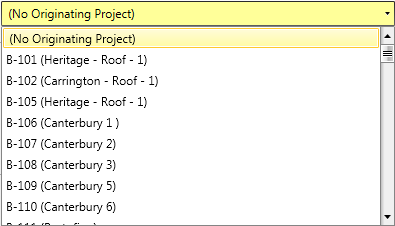
If creating a change order from an originating project, an existing bid, project, or master project must already exist.

Steps

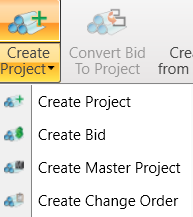
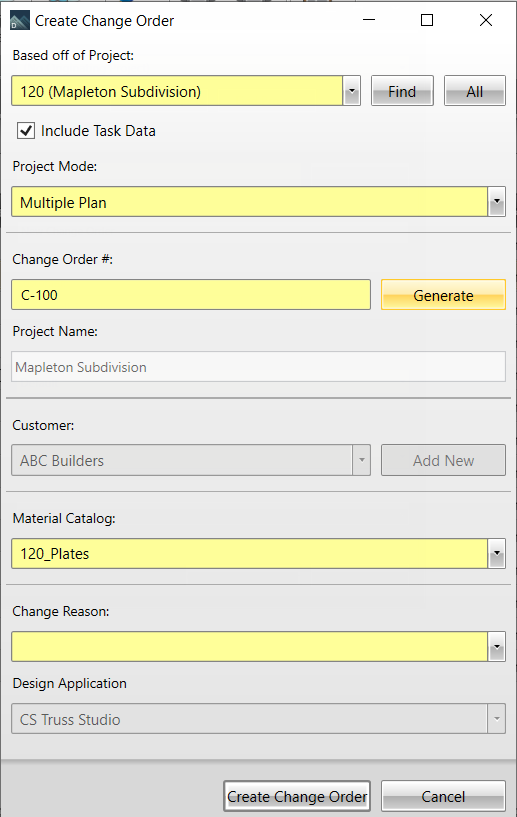
To create a change order:

  1. From the main CS Director window, select Project List.
  2. Click Create Project > Create Change Order.


  1. Complete the required fields and any additional fields that are needed.

Required fields are highlighted in yellow.

  1. By default, the change order is not based on an originating project, however, an originating project may be selected from the list.

  1. Select Include Task Data to copy all task data to the project, including dates, assignees, notes. If this is unchecked, the task is saved, but not the task data.
  2. Select the Project Mode; Single Plan is for projects that use only a single plan/elevation; Multiple Plan is for projects with more than one plan/elevation.
  3. Change Order # is initially populated using the next sequential number. This can be overwritten with a manual project number.

a.  To define preset numbering, see Project Numbering Field Descriptions .

b.  Click Generate to populate the next number in the sequence.

  1. Project Name automatically defaults to the selected project name.
  2. Customer is grayed out and automatically populated with the customer name assigned to the originating project.
  3. Select a Material Catalog to be assigned to the change order.
  4. Select a Change Reason from the list.

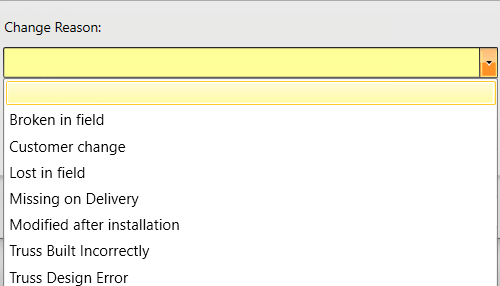
For more information on preset options, see Change Order Reasons Field Descriptions.

The Design Application is grayed out and not editable.

  1. Click Create Change Order.

The Change Order displays in the Project List. The Project number has a prefix of C.

Related Topics