Purpose
Create overhangs that extend beyond the outside bearing of a truss.
Steps
To create overhangs:
1. Click  next to Overhangs to open the Left overhangs or Right overhangs window.
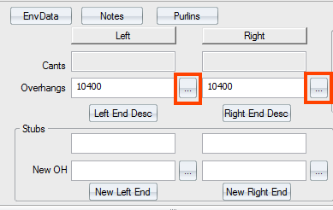
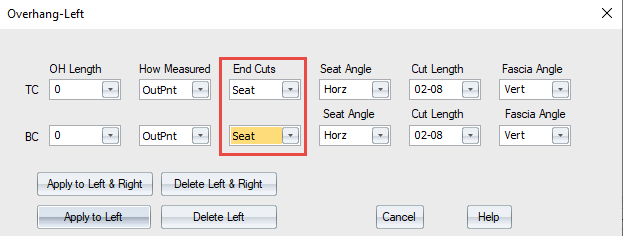
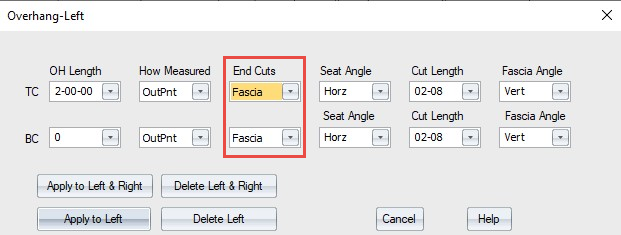
The Overhang Left/Right dialog displays with the current overhang lengths; the BC length defaults to zero. Both the Overhang Right and and Left windows contain the same settings.
2. Define the following options:
OH Length - select the overhang length for both top and bottom chords
How Measured - select the method for measuring the overhang from the drop down list
- OutPnt - Horizontal measurement from the longest point on the overhang to the heel.
- InPnt - Horizontal measurement from the shortest point on the overhang to the heel
- Rake - Measurement along the top side of the overhang to the heel
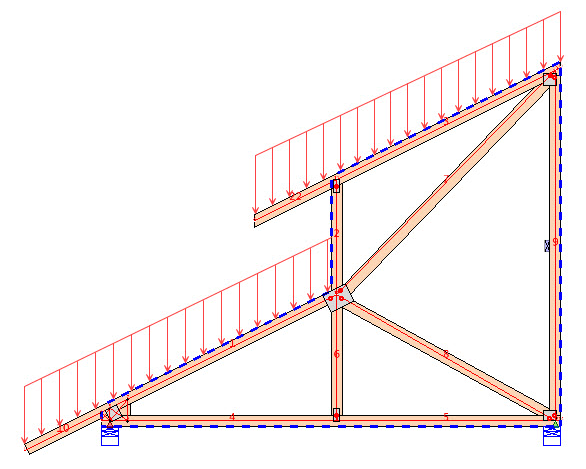
End Cuts - select the type of cut to use at the end of the overhang from the drop down list. Examples of each type are shown in the illustration below.
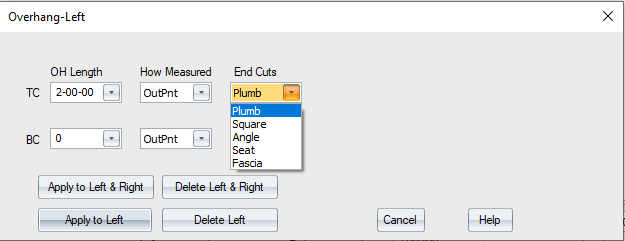
When Seat or Fascia end cuts are selected, additional fields for Seat Angle, Cut Length, and Fascia Angle display on the dialog.
- Plumb cut - Single cut, perpendicular to the x-axis. (See 2).
- Square cut - Single cut, perpendicular to the board. (See 2).
- Angle cut- Single cut which is at the angle set in the Angle 1 field. (See 4). When you select this option, you can choose an angle from the Angle dropdown list.
- Seat cut (formerly DblCut) - Double cuts which are at the angles set in the Angle 1 and Angle 2 fields. (See 3).
- Fascia - Fascia cuts on ends (See 5). If you select Fascia, the dimension to enter is the vertical or fascia cut. Both the seat and/or the fascia cut can be at an angle; these cuts do not need to be horizontal and vertical.
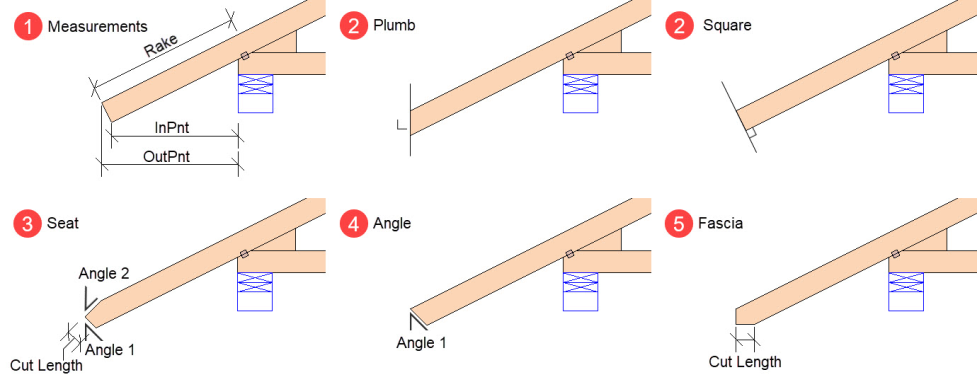
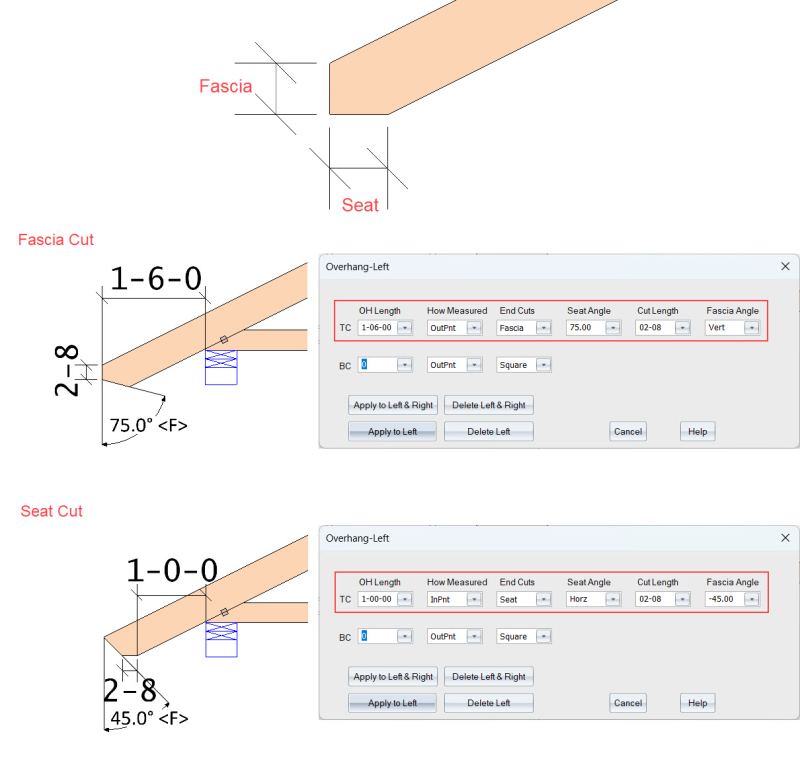
Dimension - enabled if Seat (formerly DblCut) is selected. You can select the length of Angle 1 on a seat cut end from the drop down list, or enter it manually. (See 3).
Angle 1 - enabled if Angle or Seat is selected. You can select the angle for an angle-cut end, or the lower angle for a seat cut end from the drop down list, or enter it manually.
Angle 2 - enabled if Seat is selected. You can select the upper angle for a seat cut end from the drop down list, or enter it manually. (See 4).
 Note: Angles are measured in degrees from a plumb line through the reference point on the end of the overhang. A positive angle is a cut toward the truss; a negative angle is a cut away from the truss.
3. Click OK to save your changes.
The Overhang field reflects information that you defined in the Overhangs dialog.

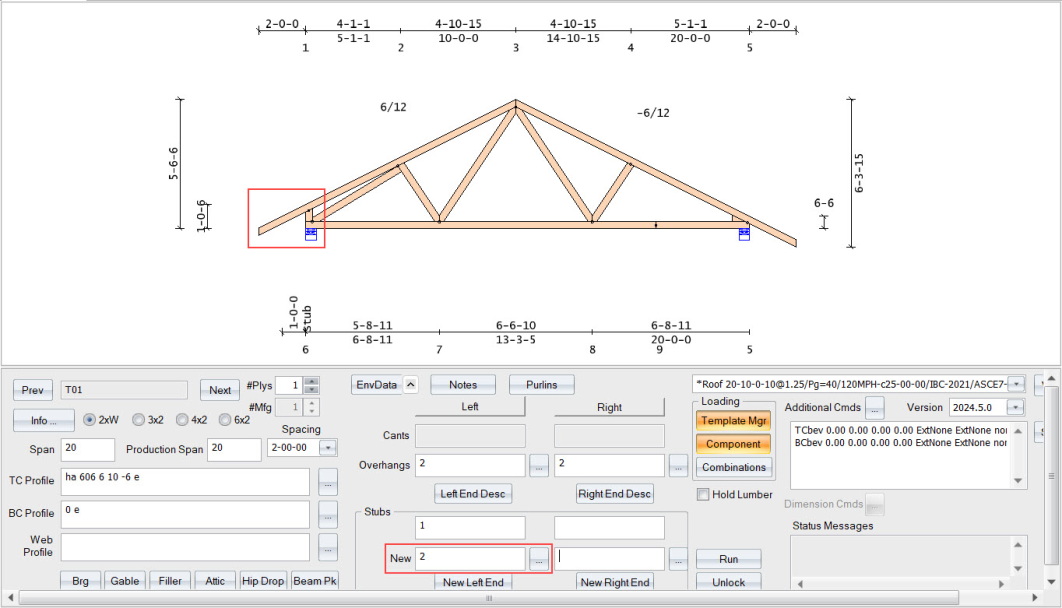
Create New Overhangs on Stubbed Truss
When a truss is stubbed, the existing overhangs are deleted. The New OH functiona lets you add overhangs to a stubbed truss.
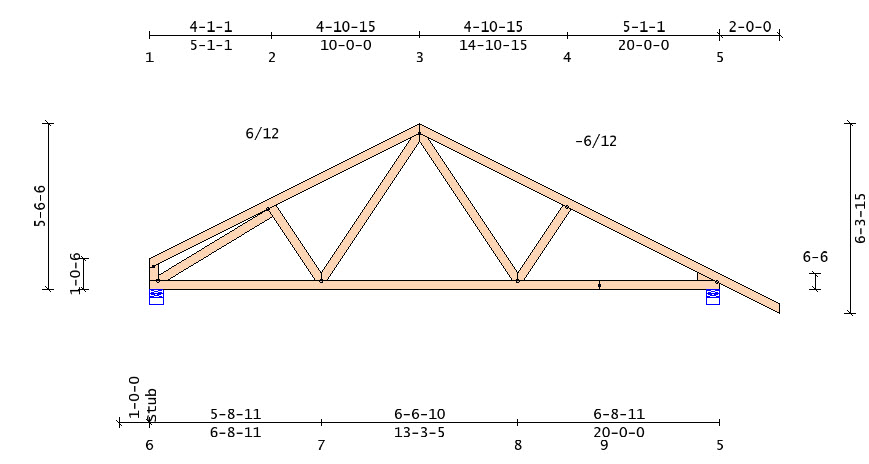
In this case, the left end was stubbed, removing t overhang.
Follow these steps to add a new overhang:
1. In the New OH box, enter the length of the overhang or click next to New OH and enter the information in the window. This is the same process as described above for creating overhangs.