Purpose
Custom Labor allows each customer to set up labor costing to match their methods of tracking labor through all portions of the yard and development.
Steps
To create a custom labor scheme:
1. In the Project List window, select Tools.
2. On the Tools ribbon, click Presets.

3. Select Pricing.
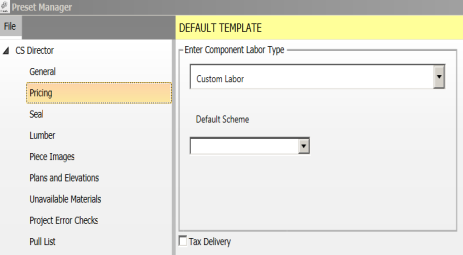
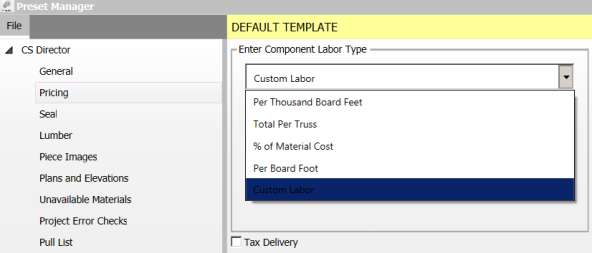
4. In the Enter Component Labor Type drop down list, select Custom Labor.
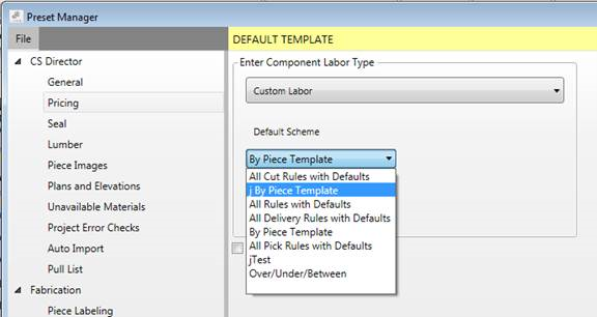
5. To select a Default Scheme to be used when creating projects, click the drop down list, and select a scheme.
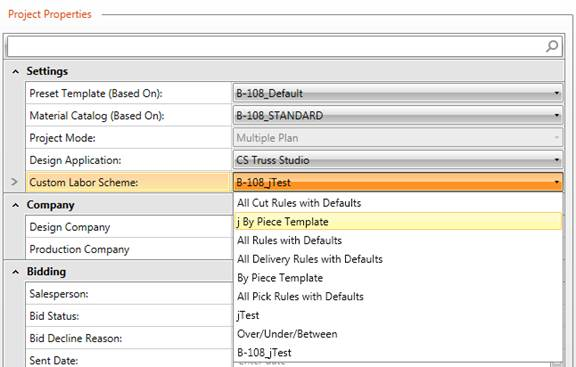
Project schemes can be changed from within a project on the Project Info tab > Project Properties > Custom Labor Scheme. Labor schemes are brought into projects and can be changed in the same way as presets and material catalogs.
6. Close the Preset Manager window.
Create a Custom Labor Scheme
From the Project List, you can click Custom Labor. When inside a project, you can click Custom Labor or Project Labor.
7. On the Tools ribbon, click Custom Labor or Project Labor.


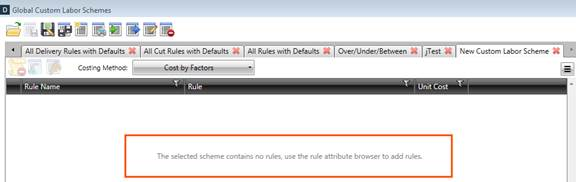
8. The Global Custom Labor Schemes window display.
If there are no existing schemes, then the dialog will open with a empty scheme named "New Custom Labor Scheme"
Empty schemes will show a prompt to add rules from the Rule Attribute Browser.
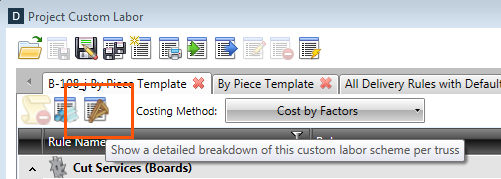
View the Custom Labor Results in the Project
Project Custom Labor dialog shows the Total Cost for each rule based on the trusses in the project.
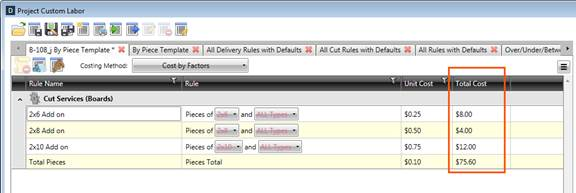
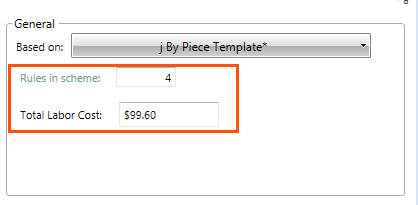
Project Custom Labor dialog also shows the total labor cost for the project.
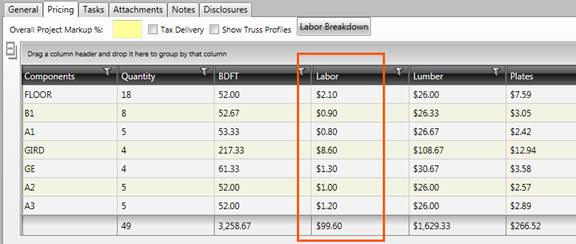
The pricing tab shows the labor for each truss, with the extended labor in the total row.
The Detailed Breakdown report shows the cost applied by each rule for each truss.

Related Topics