Purpose
Use to create a new or edit an existing project filter.
Prerequisites
Before editing a filter, a project filter must exist.
Modifications are applied to the most recently selected project filter.
Steps
To create or edit a filter:
1. On the Project List tab, click Project Filter.

2. Select Create or Edit Filters.
![]()
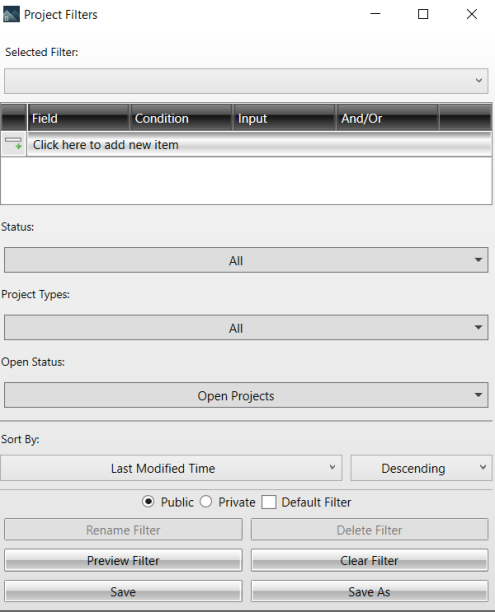
3. From the Project Filters window, select all filter options.
The Project Filters window displays.
4. Enter or revise information for the following fields:
- Selected Filter: Click to select a filter from the drop down list.
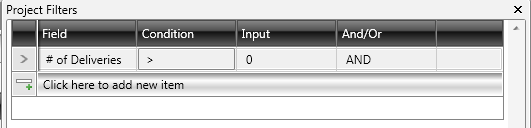
- Field: All available data including standard and custom fields. When you click to add a new item, a drop down list displays where you can select information for that field.
- Condition: Define the qualifying condition.
Equal to (=): The field value must be set to the specified Input value.
Not Equal to (<>): The field value must not equal the specified Input value.
Is Empty: The field value must not be populated. The Input field is ignored.
Is Not Empty: The field value must be populated. The Input field is ignored.
- Input: The comparison value used by the Condition operator varies based on Input selection.
- And/Or: Group selection criteria together with an AND or an OR in order to drill down to specific filter.
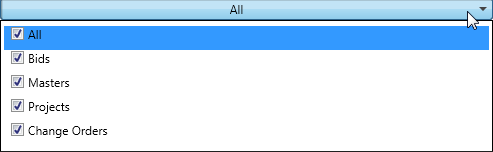
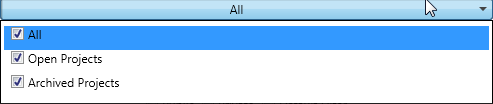
5. For Status, click All and check the options that apply to the new or revised filter.
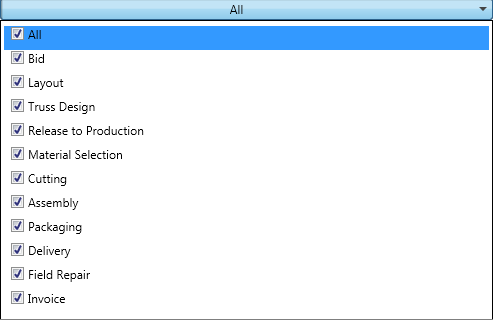
6. For Project Types, click All and check the options that apply to the new or revised filter.
7. For Open Status, click All and check the options that apply to the new or revised filter.
8. For the first Sort By option, click the down arrow and select options to sort the filter.

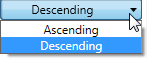
9. For the second Sort By option, click the down arrow and select Ascending or Descending.
10. Select whether the filter is Public, Private, or the Default Filter.

11. To save a new filter:
a. Click Save As.
.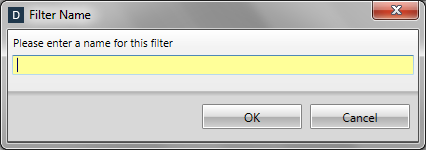
b. Enter a name.
c. Click OK.
12. To save a revised filter, click Save.
Use caution when creating or editing a filter. Be sure to recognize the current Project Filter being modified which is displayed in the window heading.
Related Topics